Outlook Email Group Guide
How to Create an Email Group in Outlook
There are three ways to create an email group in Outlook: a contact group (a personal list, best for most people), a Microsoft 365 group (a shared workspace with its own address), and an admin-created list (for whole organizations). Here's how to set up each one, step by step.
Looking for the admin-managed kind specifically? Our guide to create a distribution list in Outlook covers that route in full, including the Microsoft 365 admin center.
Setting up a list for a club, team, HOA, or church — where everyone needs to send and reply? An Outlook contact group isn't built for that. Skip to the simpler option ↓
The Three Kinds of "Group" in Outlook (Pick the Right One First)
Microsoft uses the word "group" for three different features, which is why half the guides you'll find seem to describe a different screen than the one in front of you. Two minutes here saves you twenty minutes of clicking through menus that do not exist in your version.
| You want to… | Use | Who can use it |
|---|---|---|
| Email the same set of people from your own account | Contact group | Just you |
| Give a team a shared address, inbox, calendar and files | Microsoft 365 group | Your organization (work/school accounts) |
| Let everyone in the company email one list address | Admin-managed list | Set up by your IT admin |
If you're using a personal Outlook.com account, only the first option exists - Microsoft 365 groups and admin-managed lists need a work or school account. (That's the answer to "why can't I create groups in Outlook?" - the feature isn't in personal accounts.)
Not sure which account you have? Look at the address you sign in with. Anything ending in
outlook.com, hotmail.com, or live.com is a personal Microsoft
account. An address at your employer's, school's, or organization's own domain is a work or school
account, and that's the one that unlocks the other two options - assuming your admin hasn't
restricted them.
For most people reading this - a club secretary, a committee chair, a team lead, a parent coordinating a year group - the answer is the contact group. It is the only one that works on any account, needs nobody's permission, and takes two minutes. Start there, and read the catch further down before you build a group you'll be maintaining for years.
Need the admin-managed kind? See our full guide to creating a distribution list in Outlook.
How to Create a Contact Group in Outlook (The Way Most People Want)
A contact group is a saved set of addresses you can message with one entry. It works on any Outlook account - personal or work - and takes about two minutes. The steps differ slightly depending on which Outlook you have, so pick your version below.
New Outlook and Outlook on the web
New Outlook for Windows and Outlook in a browser share the same interface, so these steps cover both. If your Outlook has a New Outlook toggle in the top-right corner rather than a classic File / Home / Send-Receive ribbon, this is your version.
Step 1: Select the People icon in the left-hand navigation pane. This opens your contacts.
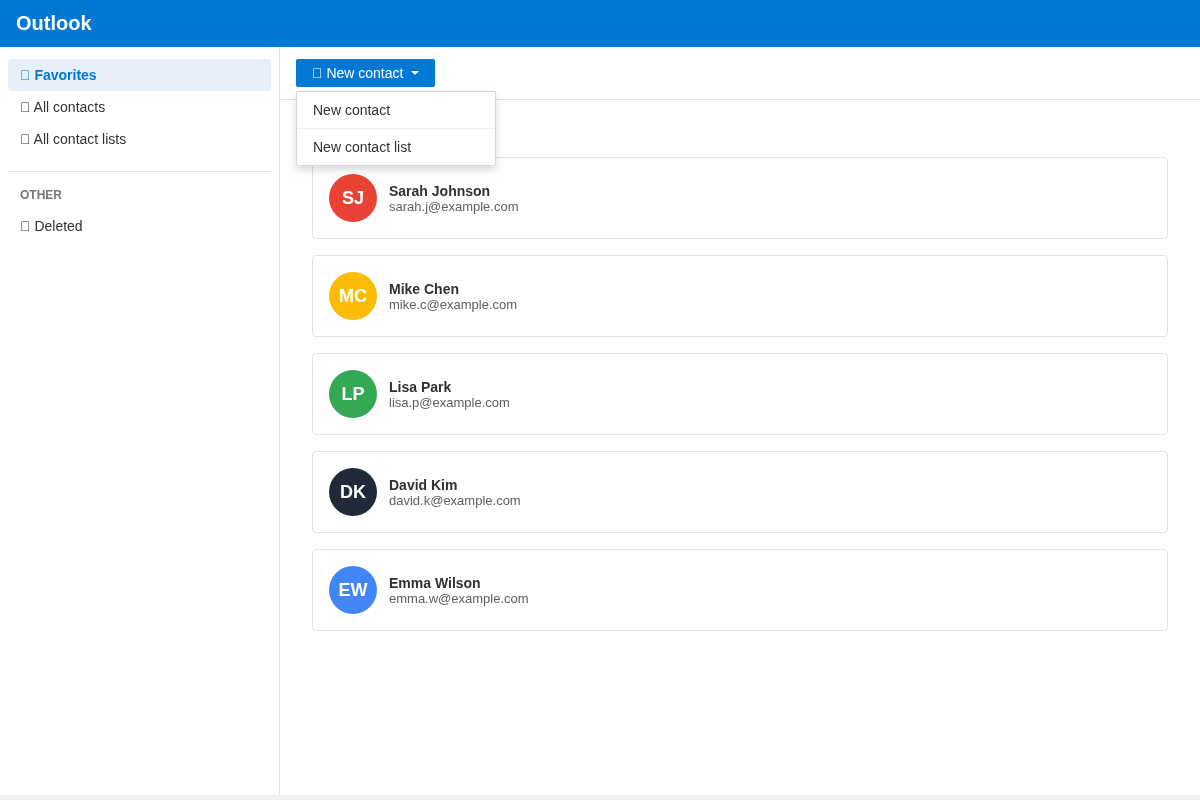
Step 2: Select the arrow next to New contact at the top of the page, then choose New contact list. (In some builds you'll find the same option under a Contact Lists folder in the sidebar.)
Step 3: Give the group a name people will recognise in a To field - "Book Club," "Committee 2026," "Under-11s Parents." Then add members: type or paste email addresses, separated by semicolons. Existing contacts autocomplete as you type.
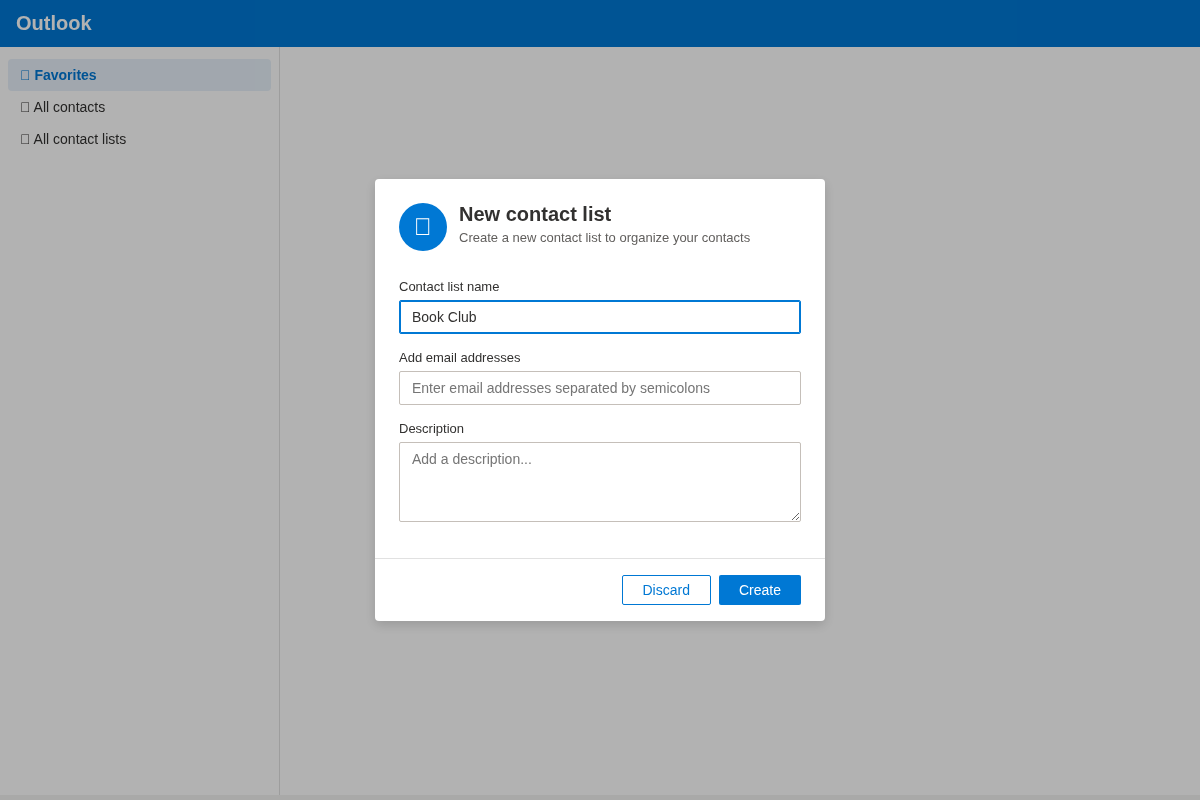
Step 4: Select Create. The group is saved and ready to use - type the group name in the To or BCC field to send.
Note: only you can send to this group, and replies come back to you alone. If your members need to email each other, that's what a shared group address does — free to set up.
Classic Outlook for Windows
Classic Outlook calls the same feature a Contact Group and puts it in the ribbon.
- Select the People icon in the bottom-left navigation bar.
- On the Home tab, select New Contact Group. A new window opens.
- Type a name for the group in the Name field.
- Select Add Members, then choose from Outlook Contacts, from your Address Book, or New E-mail Contact to type an address that isn't saved yet. You can mix all three.
- Select Save & Close. The group now appears in your contacts - type its name in the To or BCC field to send.
On Mac
Outlook for Mac calls the feature a Contact List. Open People, select New Contact List, name the group, add member addresses, and choose Save & Close. Then type the group's name in the To or BCC field to send.
If New Contact List is greyed out, go to Preferences → General and uncheck "Hide On My Computer folders", then try again. On very recent builds the option is sometimes missing entirely while Microsoft reworks the app - if so, create the list in Outlook on the web instead and it will sync to your Mac.
How to Create a Microsoft 365 Group in Outlook
A Microsoft 365 group is a bigger thing than a saved set of addresses: it comes with its own email address, a shared inbox, a shared calendar, a SharePoint document library, and a Teams presence if your organization uses Teams. You need a work or school account to create one.
- In Outlook, find Groups in the folder pane on the left.
- Select New group (in classic Outlook, it's New Group on the Home tab).
- Enter a name and description. Outlook proposes a group email address based on the name - check it before continuing, because it's awkward to change later.
- Choose the privacy setting: Private (members must be added or approved) or Public (anyone in your organization can join).
- Add members, then select Create.
If New group is missing or greyed out, it's not a bug: either you're on a personal account, or your admin has restricted who can create groups. Both are common.
The honest caveat: a Microsoft 365 group gives everyone another inbox and workspace to check, and conversations sent to the group inbox are easy to miss unless members subscribe to have them delivered to their own inbox. If all you want is one email reaching everyone, this is overkill.
How to Send a Group Email in Outlook
Once the group exists, sending to it is the easy part. Compose a new message and start typing the group's name in the To field. Outlook suggests it as you type; select it and every member's address is filled in.
One decision worth making deliberately: To or BCC. Addresses in the To field are visible to every recipient. For a committee of six that's fine; for a 200-person community list it is a privacy problem, and one careless "Reply All" turns it into an inbox problem for everyone. Putting your own address in To and the group in BCC hides the member list - but replies then come back only to you, not to the group.
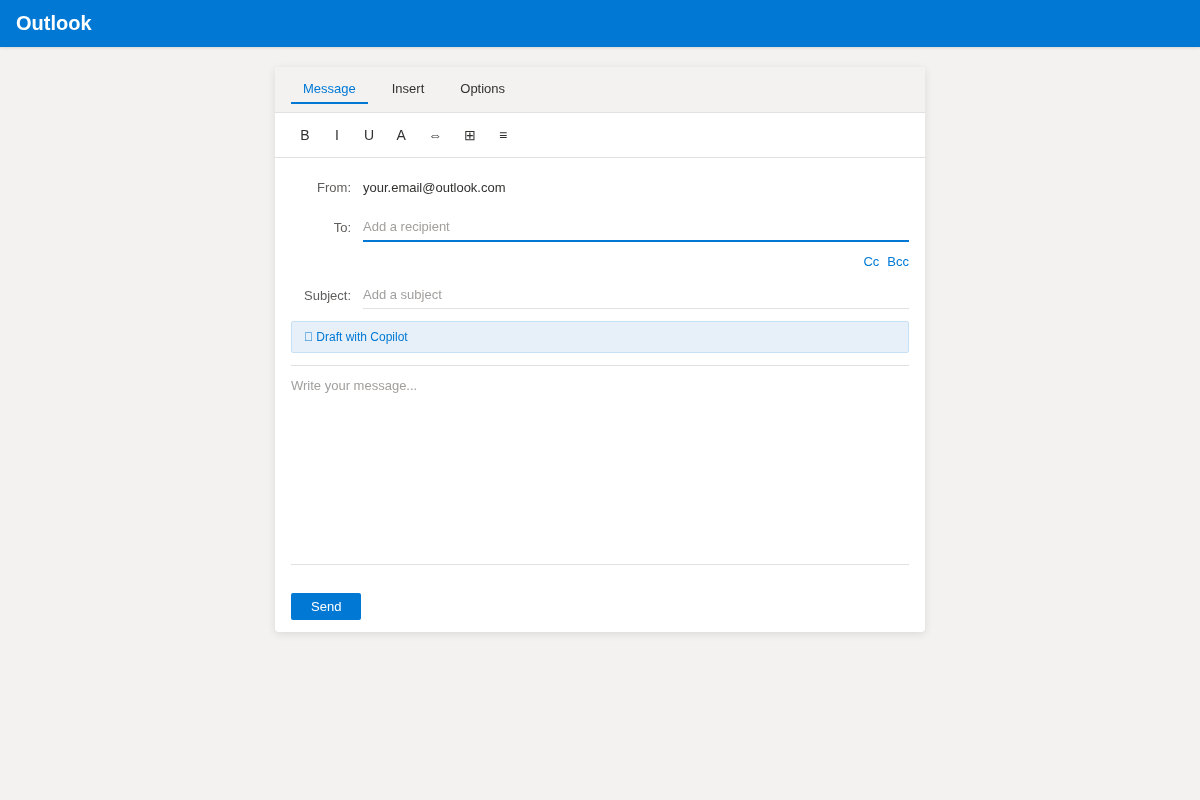
There's a fuller walkthrough of that trade-off in our guide to sending a group email without showing recipients.
How to set up a group email that works outside Outlook
The steps above set up a group email inside your own Outlook account. If your members use Gmail, Yahoo, Apple Mail or a mix of everything, the contact group still sends fine - Outlook simply expands it to a list of addresses - but nobody outside your account can use it, and replies still come back to you alone. To set up a group email that works across every email app, give the group its own address: anyone can send to it, everyone receives it, and members manage their own membership. That is the shared group address covered below, and it is free to set up for small groups.
The Catch: Your Email Group Only Works for You
A contact group lives in your contacts, and it is not a real mailing list: nobody can join or leave on their own. Your co-organizer can't send to it, there's no archive, and when you email more than a handful of people you'll hit Outlook's recipient limits and spam-filter problems. Groups run this way tend to live in one volunteer's account - and leave with them.
In practice that shows up as:
- Only one person can send. Sharing means forwarding a copy of the group, which immediately drifts out of date.
- Replies don't reach the group. They go to whoever sent the message, who then forwards them by hand.
- You are the membership system. Every join, leave, and address change is an email to you and an edit by you.
- No shared history. A new member has no way to see what was discussed before they arrived.
- Sending limits. Roughly 500 recipients per message on Outlook.com, with lower daily caps on new accounts - and large sends from a personal mailbox are more likely to be filtered as spam.
If your members are on Google Groups today, see the Google Groups alternatives: the same trade-offs apply there, with a Google account required on top.
Everyone on the list can see everyone else's address, and there's no unsubscribe. A group email service sends each member an individual copy and handles joins and leaves for you.
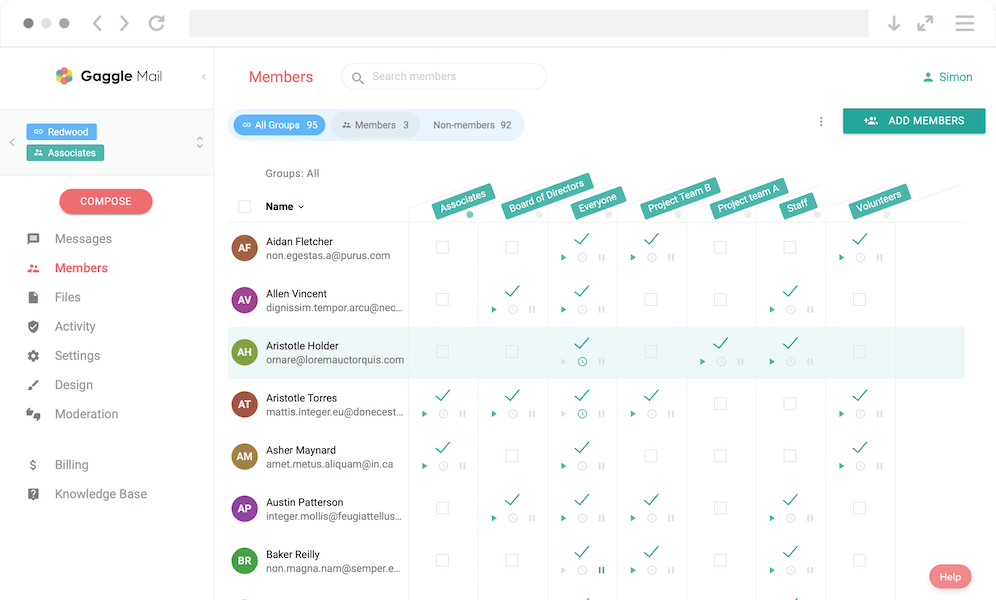
A Simpler Option: A Group Address That Works for Everyone
If the group is ongoing - a club, a committee, a team, a congregation - the fix is to stop storing the list in one person's contacts and give the group its own address.
Gaggle Mail
gives you one address like yourgroup@gaggle.email. Anyone you allow can send to it,
and everyone in the group receives it. Members join and leave themselves, every message is kept in
a shared archive, and addresses stay private. It works with Outlook and every other email app -
nobody has to sign up for anything or change how they read their mail.
Only you can send to the list
Every member sees everyone else's address
Every join and leave is an edit you make by hand
No history — new members start blind
Locked to your Outlook account
Anyone in the group can send — if you allow it
Each member gets an individual copy — no address list exposed
Members join and leave themselves
A searchable archive so new members can catch up
Works with Outlook, Gmail, and every email app
How does it compare?
| Feature | Outlook contact group | Microsoft 365 group | Gaggle Mail |
|---|---|---|---|
| Who can send | Only you | Members of the group | Anyone you allow |
| Shared ownership | ✗ | ✓ | ✓ |
| Self-service unsubscribe | ✗ | Public groups only | ✓ |
| Shared message archive | ✗ | ✓ | ✓ |
| Member limit | ~500 recipients per send | Varies by plan | No per-send cap |
| Works outside your organization | ✓ | Guests only, admin-controlled | ✓ |
| Admin required | No | Often | No |
| Cost to start | Free with Outlook | Microsoft 365 plan | Free |
Gaggle Mail is free for small groups - see pricing for larger ones. For the wider field, see our comparison of group email services.
Give your group its own address
Members keep using Outlook, Gmail, or whatever they already have - no accounts to create, nothing new to learn.
Frequently asked questions
What people are saying
Join thousands of communities using Gaggle Mail
“Gaggle Mail transformed how our neighborhood association communicates. It's so intuitive that even our less tech-savvy members participate actively. The moderation tools are exactly what we needed.“

“Overall technical execution and ease-of-use make Gaggle Mail the best option in the market.“

“Solid, stable. Just works. Great interface. Works for everything we need.“

“Amazing alternative to google groups, which forces you to have a gmail account and is complex to join as a user.“

“Your service never fails and when we have questions, you respond immediately!“

“Outstanding service. Whenever we have a question or face an obstacle someone is there to assist.“

“It's straightforward. It works. No advertising banners. We love it!“

“The customer support is outstanding. Any questions we had while setting up our alumni network were answered promptly and thoroughly.“

“I love Gaggle Mail because I have never had a problem. It just works.“

“The migration from our old listserv was smooth and the interface is modern and clean. Our members adapted to it immediately.“

“I use it for a Boy Scout troop. I tried a couple of other applications and yours is by far the best.“

Need a better way to run group email?
Create a real group email address with privacy, replies, moderation, and archive built in.
Create your free groupTakes 2 minutes • No credit card